
Stucco Installation in Washington, UT: Systems, Assembly and Cost | Washington Elite Stucco
Washington Elite Stucco provides stucco installation for homeowners and property owners in Washington, UT. A finished stucco wall is not a waterproof skin. Water reaches the back of every exterior cladding eventually, through a hairline crack, around a window, or driven in by wind, and stucco is built as a drainage assembly that catches that water behind the finish and drains it back out.
We install traditional three-coat stucco over metal lath, and we install engineered one-coat systems. Both go over framed walls with sheathing and over masonry.
How long a new wall lasts is decided almost entirely by parts you will never see again once the finish coat goes on: the water-resistive barrier behind the lath, the lath and how it is fastened to the wall, the weep screed at the base, and the control joints, which are laid out before any plaster is mixed. Our stucco installers get those right first, because not one of them can be corrected once the wall is closed.
We take stucco siding installation work across Washington County and the St. George area. Call (435) 319-6039 or send us your details through the quote form, and we will visit the property to look at the wall.
Get A Free Estimate
What We Do
Stucco Systems We Install
Three different wall systems get sold under the name stucco, and all three end the same way, in a finish coat you can see and pick a texture for. What separates them sits underneath that finish. Which one belongs on your building follows from what the walls are made of and how the building is used, not from what a crew is in the habit of installing, and we settle it in the written scope before the stucco installation starts.
Traditional Three-Coat Over Lath
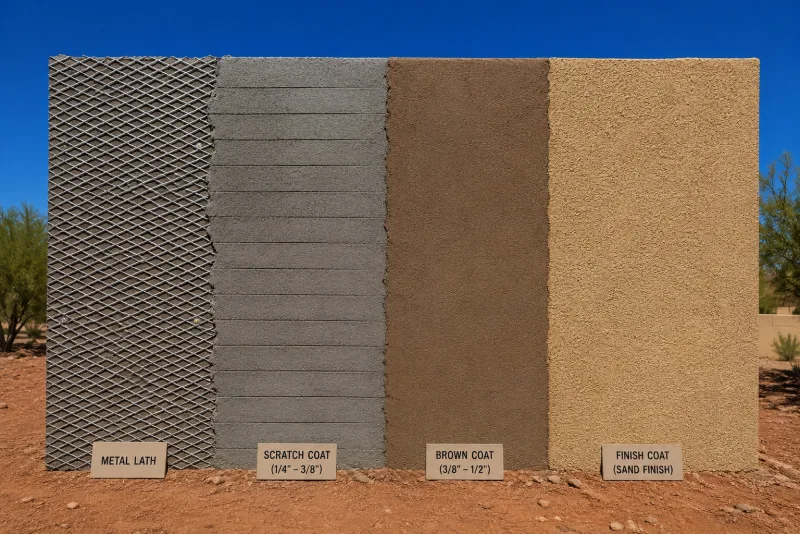
This is the system the residential code treats as the default for stucco siding installation, and it is built in three separate passes rather than one coat applied in stages. The scratch coat goes on first and is raked with horizontal grooves so the layer above it has something to key into. The brown coat follows and is straightened flat, which is what makes a wall look true from the street. The finish coat carries the color and the texture.
Over metal or wire lath, IRC R703.7.2 calls for not less than three coats, and the three together are meant to reach a nominal thickness of 7/8 inch. Each coat waits for the one beneath it before it goes on.
One-Coat Engineered Systems
A one-coat system is not a thinned-down three-coat wall. It is a specific assembly that a manufacturer has built and tested as a unit, and it goes on as a fiber-reinforced base coat followed by a finish rather than as three separate coats. What governs the installation is that manufacturer's ICC-ES evaluation report, an independent technical review of the assembly published so a building official can confirm it performs as the maker claims, rather than the code's three-coat provision. That report is what our stucco installers build to, so you get a finished wall in fewer passes, and every part of it answers to one manufacturer rather than being mixed with another maker's.
Where EIFS and Acrylic Finishes Fit
An acrylic finish on its own is not EIFS. EIFS is a complete insulated cladding system: foam insulation board fixed to the wall, a base coat spread over it, a reinforcing mesh embedded in that base, and a finish on top. Dryvit is one of the brand names it is sold under, which is why owners who search for eifs contractors or dryvit installers sometimes turn out to have a hard-coat stucco wall instead, cement plaster underneath and an acrylic coating on the surface.
Changing that surface does not turn the wall into EIFS. The residential code addresses EIFS with drainage at R703.9.2. If you already have an EIFS wall and something has gone wrong inside it, that is a diagnosis rather than an installation, and we cover it under stucco remediation instead.
Stucco Installation Over Different Substrates
Before a system is chosen we need to know what the wall underneath is made of, because that decides whether the plaster is held on by metal lath or bonded straight to the surface. It is the first question asked on the walk, and it is answered before a stucco installation is priced. The substrate, meaning whatever the plaster will sit against, gets judged on three things: whether it is sound, whether it is dry, and how much suction it has, which is how strongly a surface pulls water out of fresh plaster.
Framed Walls With Wood Sheathing
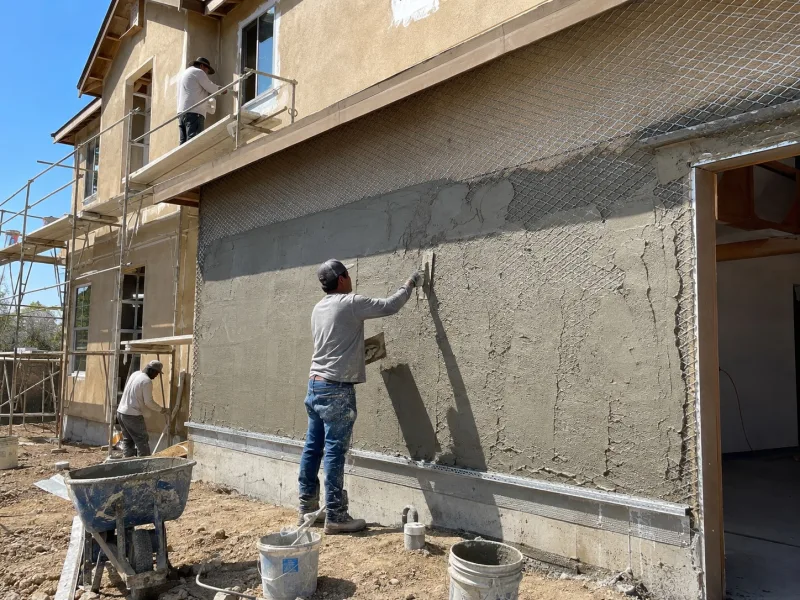
Most houses are framed with studs and covered in plywood or OSB, the panel boards nailed across that framing. Plaster never goes directly onto either one. A water-resistive barrier goes on first, self-furring metal lath is fastened through the sheathing into the framing behind it, and the plaster is keyed into that lath. What holds a stucco siding installation on the wall is therefore steel fixed to wood, not the plaster sticking to a board. Wood-based sheathing also carries a stricter barrier rule than masonry does, and what that rule asks for is set out further down this page.
Concrete, Block and Masonry
Masonry can work the other way. Sound concrete block or poured concrete that still absorbs water will take plaster directly, with no lath between the two, because the surface pulls the fresh mix into itself and grips it. A wall that has been sealed, painted or troweled slick will not do that, however solid it is, and it has to be prepared or lathed before a stucco installation goes ahead. Block walls and masonry fences, and the preparation that goes with them, are their own service and we quote them separately.
Surfaces That Need Something Else First
Some walls are not ready for plaster at all. Sheathing that is wet, rotted or moving is replaced or corrected first and the wall is dried in before anything is mixed, because plaster conceals a bad substrate rather than curing it. The trouble underneath carries on where you cannot see it, and you have paid to seal it in. Stucco that is already failing is also a different job from a new wall: finding out why it failed is our remediation work, and we tell you that on the walk instead of quoting an installation over the top of it.
What Goes On Behind the Finish Coat
Cement plaster is not waterproof. It absorbs water in a storm and gives it up again as it dries, and that does no harm as long as the water has a route out. A wall built only to shed water, with nothing behind the plaster to carry off what gets through, holds it against the sheathing instead. What follows vanishes from sight the day the finish goes on, and it is most of what you pay for in a stucco installation.
The Two Barrier Layers Behind the Lath
Over wood sheathing the barrier is not one sheet of heavy paper. Washington County sits in climate zone 3B, a dry zone, and there the 2021 IRC as adopted in Utah asks at R703.7.3.1 for two separate continuous layers of 10-minute Grade D building paper, or a 60-minute paper with foam or a drainage space behind the plaster.
Grade D is asphalt-saturated paper, and the minute figure is how long it holds water out in a laboratory test. Two layers are asked for because fresh plaster is alkaline and grips whatever it is pressed against, so the outer sheet can stop draining. The layer shielded beneath it is the surface water runs down.
The Weep Screed and What Has to Stay Clear of It
Along the bottom of a framed stucco wall runs the weep screed, a metal edge with openings in it that lets the water coming down the barrier back out. IRC R703.7.2.1 puts the screed not less than 4 inches above bare earth, or not less than 2 inches above a paved surface, whichever it meets.
What defeats it is almost always added later: landscape rock piled up to the stucco, planter soil, a patio poured higher than the old grade, or a sprinkler head that keeps the base wet and leaves mineral staining across the finish. Keeping that strip clear is the maintenance a new wall needs from you.
Where Flashing Meets the Barrier
Most of the water that reaches the inside of a wall arrives at a junction rather than through the middle of the plaster: around windows and doors, where a roof meets a wall, and at every pipe or vent passing through. Flashing is the sheet metal that carries water back out there, and it helps only if it drains onto the barrier instead of behind it. That is why the code has flashing tied in between the two barrier layers.
The piece most often missing is the kick-out at a roof-to-wall junction, the small bent flashing that throws water clear where a roof edge ends, because the roofer and the plasterer each assume the other one set it. At every opening we set casing bead, the metal trim that stops the plaster in a straight line.
Lath, Fasteners and the Panels a Wall Is Divided Into
A cement wall handles being squeezed far better than being pulled apart, so the steel buried in the plaster does the pulling. Metal lath is that steel, a sheet of expanded wire the wet plaster is pressed into and hardens around. Control joints then divide the wall into panels and give the plaster set places to move, so the field between them stays whole. Our stucco installers settle both before a stucco installation begins. Movement that comes from the ground under the footing is a foundation problem and a different trade.
How the Lath Is Tied On
Self-furring lath has small dimples pressed into it that hold the wire a fraction of an inch off the barrier. That gap lets the plaster push through the mesh and harden behind the wire, locking the steel inside the coat. Sheets overlap each other by at least 1 inch. Fasteners pass through the sheathing and bite into the studs behind the wall, and both they and the metal accessories are corrosion-resistant, since the base of your wall gets wet. Lath carried straight across a control joint ties the two panels back together and cancels the joint.
Panel Size and Where the Joints Go
Fresh plaster shrinks as it cures, and keeps moving with the temperature afterward. A control joint is a break in the plaster, backed by metal, that gives the movement a place to happen. ASTM C1063 sets the limits: a panel of about 144 square feet, no side longer than 18 feet, and no panel more than two and a half times as long as it is wide.
Those limits are why joint positions are drawn before the lath goes up. Fine hairline lines in the field are normal in a cement wall, not a sign that a joint has failed. We treat an existing crack as repair work, not as part of a new installation.
Curing a Stucco Installation in Desert Heat
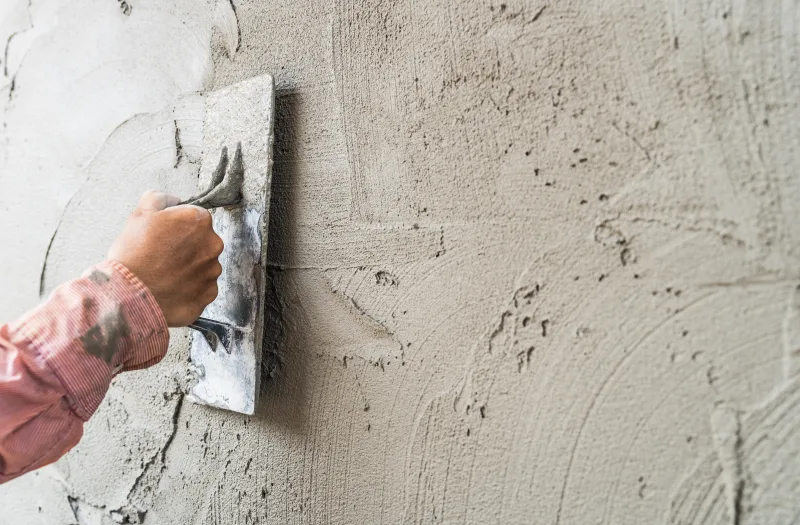
Hardening and drying are not the same thing in a cement wall. Plaster gains its strength by hydration, a reaction between the cement and the water mixed into it that continues only while that water is present. A wall the sun pulls dry too early ends up weaker, with a web of fine surface lines across it. That is why a stucco installation runs in weeks rather than days: the waits in the schedule are the wall gaining strength, not a crew working slowly.
The Two Waits That Do Not Move
IRC R703.7.5 sets two minimums for a three-coat wall. The brown coat goes on no sooner than 48 hours after the scratch coat, and the finish coat waits a full seven days after the brown. Through the first wait the scratch coat stiffens enough to carry the next layer. Through the second, the brown coat does most of its shrinking. A finish spread over a coat that is still moving moves with it and then cracks. Both figures are floors rather than targets: hot, dry weather stretches them, and nothing shortens them.
Keeping Fresh Plaster Damp
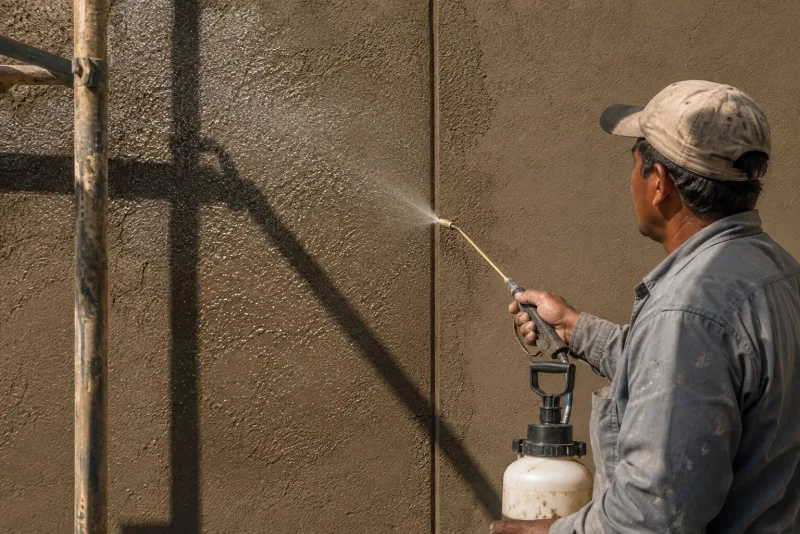
IRC R703.7.4 asks that each coat be kept in a moist condition for at least 48 hours before the next one goes on. That is moist curing, and in a Washington summer, with highs above 100 degrees and dry wind, it takes deliberate work.
We damp the substrate before plastering so it does not pull water out of the mix on contact, we fog the fresh coats, and we plan which elevation is worked at which hour so no wall is troweled in afternoon sun. If you see the crew wetting a wall that already looks finished, that is the reason. A wall kept shaded and damp through its first days is the one that stays sound.
Why Us
Why Choose Washington Elite Stucco for Stucco Installation
You cannot inspect a stucco installation after it is finished. The barrier laps, the fastener spacing and the joint layout are all under the plaster by the time anyone looks at the wall, which leaves you judging a crew by how it works rather than by the finished surface. None of it can be put right later without opening the wall back up, so it is done correctly the first time or not at all.
We install all three systems, so the one we recommend is not the only one we know how to build. The panel layout is drawn before the lath goes up rather than judged by eye at the wall. Coats are moist cured against the heat instead of pushed through it. And the crew that walks the wall with you is the crew that builds it.
Three Systems, One Recommendation
A crew that installs one system recommends one system. We build traditional three-coat, engineered one-coat and insulated systems, so what we put forward follows the substrate and the use of the building rather than what we are set up for. On your wall, that recommendation turns on whether plaster is going over framed sheathing, masonry or a surface that needs correction first. We tie the stucco installation to the wall we inspected by naming the system in the written scope before we put a price on the work.
Licensed, Insured, and Fifteen Years In
Washington Elite Stucco is a licensed stucco contractor carrying general liability and workers compensation coverage. We have 15 years of experience and more than 1,000 completed projects behind us, and every job starts with a free estimate. After the visit you get a written scope within 24 to 48 hours. Those details give you the basic contractor information, the timing of the scope and the cost of the first visit before you decide whether to book the stucco installation. Call (435) 319-6039 or use the quote form to book that estimate.
Pricing
The Cost Of Stucco Installation
A stucco installation is priced by the square foot of wall, and published national guides list install-only work at roughly $10.69 to $17.33 per square foot. That is a published industry range rather than our price. Scaffolding and access are carried as a line of their own rather than folded into the rate. Our estimate names the measured wall area next to the price and names the system it covers, and a bid that will not tell you which system it is for is hiding the difference between them.
Why Wall Area Is Not House Size
Wall area and floor area are different numbers. We measure each elevation, subtract the windows and doors, and total what is left, which is the surface the plaster will cover. Two houses with the same floor area can differ by thousands of square feet of wall, because a two-story house carries far more elevation than a single-story one on the same footprint. A floor-area figure therefore cannot be turned into a price without someone measuring, which is why the estimate follows the walk rather than the phone call.
What Moves the Number
- The system. A three-coat wall is more material and more labor than a one-coat.
- Accessories and joints. Corner bead, casing bead, screeds and control joints multiply with the number of openings and corners.
- Access. Height and a tight side yard decide how much scaffolding goes up and comes down.
- The finish. A hand-applied texture takes longer at the wall than a sprayed one.
- Substrate correction. Rot or damage found on the walk is priced separately and named separately, never absorbed into the square-foot rate.
Call (435) 319-6039 or send your address through the quote form so we can visit the property and measure.
The Three-Coat Sequence, Coat by Coat
A stucco installation runs as a series of stages, and what they have in common is that each one is checked while it can still be seen and then covered by the one after it.
- We walk the building, measure the elevations and agree on the system.
- You receive a written scope naming the system, the coats, the finish and the measured wall area.
- The water-resistive barrier goes on and the flashings are tied into it.
- Metal lath and the accessories are set, and the joint layout is marked out on the wall.
- Everything that will sit under the plaster is checked while it is still visible.
- The scratch coat goes on and is keyed, then left to cure.
- We apply the brown coat next, straighten it flat, and leave it through the longer wait.
- The finish coat goes on last, in the color and texture you chose.
We clean the site at the end of each day rather than only at the end of the job. Call (435) 319-6039 or start with the quote form.
Timing Stucco Work Through a Desert Year
Nothing about the calendar here shuts stucco work down. Winters are mild and summers are hot, and a stucco installation can start in most weeks of the year. What stops a crew is a particular day rather than a season, and the days that stop it are not the ones most people would guess.
Summer Heat and Monsoon Afternoons
Summer highs above 100 degrees do not cancel work, they move it. Coats go on at the cool ends of the day, and elevations are worked away from the sun rather than into it. The larger risk arrives with the late-summer monsoon, when a clear morning turns into heavy rain by mid-afternoon. Rain landing on a finish coat that has not set washes and pits the surface, and those marks do not trowel out later. We will not open a finish coat on a day with a storm forecast for that afternoon, however good the morning looks.
Cold Nights and Why They Matter Here
Desert winters are mild and most of the season is workable. What catches people out is the night: clear skies let the temperature fall a long way after dark, and plaster that chills before it has hydrated stops gaining strength rather than pausing and picking up again.
ASTM C926, which is the application standard for cement plaster rather than the residential code, sets a floor around 40 degrees for putting plaster on a wall unless the area is enclosed and heated. A winter installation is booked against the forecast rather than against the month, and we will tell you when a week looks wrong for it.
The First Year After a New Stucco Wall
When a stucco installation is finished we hand over what was built: the system installed, the finish and texture, and where the control joints run. Knowing that, along with what a new cement wall normally does in its first year, keeps you from paying to fix something that is not wrong.
What Is Normal in the First Months
Three different words get used for cracks, and they are not the same thing. A hairline crack is a fine line you can see but barely feel, under about 1/16 inch across. A shrinkage crack comes from the plaster curing and drying, and a new cement wall produces a few. Neither is a failure. Color also evens out over the first weeks as the wall dries, so a patchy look in week one is usually the drying rather than the finish.
A structural crack is a different thing: wider than 1/16 inch, opening further over months, or running diagonally from the corner of a window or door. That is a question about the building rather than about the plaster. We handle that kind of crack as a repair question, not as something to settle by eye.
What the Wall Needs Over Time
A hard-coat stucco wall commonly lasts 50 years or more with routine maintenance. The sealant at joints and around penetrations runs on a much shorter cycle, usually about 5 to 10 years, and replacing it on schedule keeps water out of the openings the plaster does not cover. The part that falls to you is at the base of the wall, where soil, landscape rock and sprinkler spray have to stay off. Repainting and coating an existing wall are our painting service rather than part of an installation.
New Stucco Walls Across Washington County
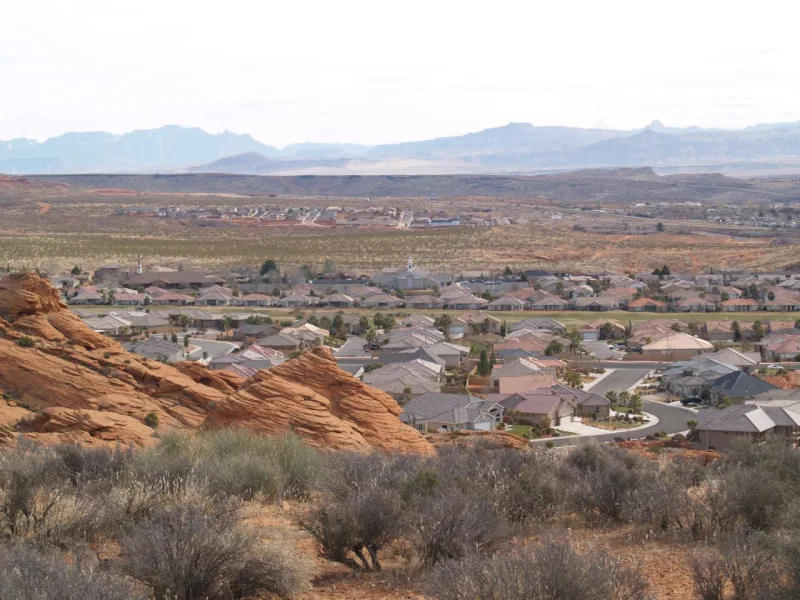
Washington sits at 2,894 feet on the northeastern edge of the Mojave Desert, and the conditions your wall faces on the valley floor are much the same from one town to the next. The sun is strong the whole year, the air is dry enough to pull water out of fresh plaster faster than the plaster can use it, and the water that comes out of the tap is hard enough to leave deposits on anything it dries on.
The day-to-night temperature swing down here is wide as well, so a wall moves more than one in a milder climate would. The higher communities we serve sit thousands of feet above the valley, and a wall there sees colder nights and a longer cold season, which changes when we can plaster rather than how the wall is built. The assembly itself is the same on a new build or a re-clad, at either elevation.
Washington Elite Stucco Installs Stucco Across Southern Utah
We build new stucco walls in these communities:
- Washington, UT
- St. George, UT
- Santa Clara, UT
- Ivins, UT
- Winchester Hills, UT
- Diamond Valley, UT
- Dammeron Valley, UT
- Veyo, UT
- Central, UT
- Pine Valley, UT
- New Harmony, UT
- Leeds, UT
- Toquerville, UT
- La Verkin, UT
- Hurricane, UT
- Apple Valley, UT
- Virgin, UT
- Rockville, UT
- Springdale, UT
Common Questions About Installing Stucco
How much does stucco installation cost?
Published national guides list install-only stucco work at roughly $10.69 to $17.33 per square foot of wall. That published range is not our price list. It only helps you compare two bids if both are quoted per square foot of wall, since a bid quoted per square foot of house is measuring something else entirely.
How much does it cost to stucco a 2000 square foot house?
Floor area does not convert into wall area, so that figure on its own does not produce an honest number. The same 2,000 square feet on one story and on two give very different amounts of wall. We measure each elevation, deduct the openings, and price from what is left.
What are the stages of stucco installation?
Barrier and flashing first, then lath and accessories, then the scratch, brown and finish coats with a wait between each. The stage worth marking is the check before the scratch coat goes on: that is the last moment anything underneath can be looked at.
What do you put under stucco?
A water-resistive barrier against the sheathing, then metal lath fastened through into the framing, then the plaster. Over wood sheathing the barrier is two separate planes rather than one sheet. A bid should name which barrier and which lath it includes, because that is the part you cannot inspect afterward.
Which water-resistive barrier should go behind stucco?
The useful question is what the assembly has to achieve rather than which brand to buy. Over wood sheathing in this climate zone the requirement is two separate continuous planes behind the plaster, and a single sheet of any product, however good, does not meet it. The written scope names what goes on your walls.
Can you put stucco directly on concrete?
Yes, over sound masonry that still absorbs water, with no lath between the two. Concrete with sealer, paint or a slick trowel finish needs surface preparation or lath first. You can test it yourself: splash a patch with water and watch whether the wall drinks it or beads it.
Can you stucco directly over plywood?
Not onto the plywood itself. Over plywood with a barrier and self-furring lath fastened through into the framing, yes, and that is how most framed houses here are built. Wood sheathing is also the case that carries the stricter barrier rule.
How long does the stucco process take?
A stucco installation on a house runs in weeks rather than days. Most of that elapsed time is waiting rather than working, because each coat has to cure before the next one covers it and nothing shortens those waits safely. Weather and access move the finish date.
What time of year is best to stucco a house?
There is no closed season here, so the useful answer is about days rather than months. Avoid starting a finish coat when an afternoon storm is forecast, and avoid a night forecast to drop below the temperature at which plaster can be applied.
How long will stucco last on a house?
With routine maintenance, the wall itself is commonly good for 50 years or more. Joint and penetration sealant runs about 5 to 10 years and is replaced several times over the life of the wall. The finish shows its age long before the plaster behind it does.
Can I install stucco myself?
A small patch is within reach of a careful owner. A whole wall is a different proposition, because the barrier laps, the flashing and the timing between coats decide whether it lasts, and every one of them disappears the moment the scratch coat goes on. A mistake there is invisible and expensive.
Start With a Written Scope
A visit settles the questions this page raises about your own building, which are the only ones that decide a price. We measure the elevations, look at what the walls are built from and how the rooms behind them function, and recommend the system that suits both. The written scope that follows costs nothing and puts you under no obligation to book the work. Call (435) 319-6039 or use the quote form to request a free estimate for your stucco installation.